Tuesday, September 25, 2012

Press’n’Seal Glad Wrap for easy Halloween decorating


I have a new decorating love! His name is Glad, Glad Press'n'Seal, and he's wonderful! So versatile, so easy, so…cheap, but in a good way, he's a gentleman you know. It was love at first craft. I had seen the idea before on Pinterest using Press'n'Seal on mirrors for Halloween spookifying at thriftydecorchick.blogspot.com , but I wanted to see just how versatile he could be, could he do lettering? Allow me to paint on doors without being noticeable? Yes, ladies, I am here to tell you that he is in fact all that and a bag of chips (cuz he can wrap up the chips too!), and the best part, he has brothers just like him! Sooo, you too can have eternal happiness too, for under $5 dollars!


Heeeeeres Press'n'Seal!!!!!!!
(I got a little excited about my new friend; we got a little silly after crafting and had to break our relationship in with some photo ops)


Ok, I'm done gushing…for now. So, you want to see what sweet, sweet crafts we came up with? I knew you would.


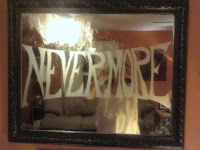
First up, Frosted mirror writing. I wanted a little something to add to The Raven Room, because I don't know if you have the same problem but I often feel that people don't always get the theme to my Halloween rooms, perhaps because I don't choose obvious themes and lean more to the obscure, like The Raven I had talked about in a previous post dreamingofpinkelephants.blogspot.com, but I do like a challenge. So to better convey my themes to my guest I prefer to just spell it out for them. Plus I thought it would be especially menacing touch to have a cryptic NEVERMORE written out in the mirror where visitors first come in.
This is a great craft for those that don't want to spend a lot on their holiday decorations and that just want to throw it away when done rather than adding to storage. This project took about twenty minutes, and if you select a simple silhouette or shorter word it would probably take less than that. All you need to complete this project is your Press'n'Seal, a pencil, and a xacto knife.


Apply your Press'n'Seal, give yourself more than you think you will need, I had to redo my first application because I was a little too stingy. Start from the middle pressing firmly, you will notice that static cling will grab it at first, but to keep it up there press your fingers starting in the middle and working your way out. To tell it's getting a good grip it will give the look of frosted glass and won't wiggle around.


Once you have pressed your P'n'S (Press'n'Seal, sorry, getting a little tired of typing it our every time you know), securely into place you can start cutting your design or if your striving for a more complicated design you might want to lightly trace with your pencil your design. Be careful not to press too hard or you will risk tearing it. To help me lay my lettering out I cut out the shape I wanted my word to take with my xacto knife.
Now that you have it laid out the way that you want, you can start lightly cutting with your knife. Again you don't want to press too hard or you'll risk snagging your P'n'S, and though I doubt the xacto knife blade is strong enough to scratch mirror glass, better safe than sorry.
As I cut, I prefer to take away the negative space as you go so you can see how its' coming out, that and I'm super impatient and I get too excited to wait.


You may notice that once you start to remove the unwanted P'n'S that it leaves a bit of a residue; it does come off with window cleaner and a bit of elbow grease, so not to worry. I left it on there because I think it gives a nice distressed mirror look that I think compliments my theme of old creepy house, so I like it. But if that's not your style of decorating you can clean it off just be careful not to get too close so you don't mess up all your hard work.


                                                  Ta Da! Isn't it awesome what he can do!


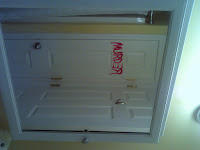
Here's another quick easy project. For years I've decorated my bathroom in a theme of Psycho/The Shining, and it just so happens that directly behind the mirror is a closet door so it would be perfect for the REDRUM scene, except for the fact that while it would be super easy, I don't feel like repainting my bathroom door every year. So I had just about given up on that project till he came into my life and made my dreams come true!


Apply your P'n'S to your door, I started again in the middle but this time I went with the direction of the wood grain so it would blend well. This time don't trim the excess until your paint has dried so you don't get wet paint all over your door.


To apply the paint, I just dunked my finger in the paint, and it gave the same look as the movie, which is good, but bad because truth be told, I am terrified of that movie and now I am slightly afraid to use my bathroom, which means it's awesome!


Once your paint is dry trim the excess off, or if you're impatient like me keep your magic eraser handy when you inevitably smear wet paint on your door. Once you have trimmed any unwanted P'n'S off, press the free edges down and admire your work!


Isn't it cool how you can see it backwards in the mirror just like in the movie, Eeeeeee!
Like I said before this is very versatile so it would be great for other holidays and events, I'm already planning on some pretty snowflakes for Christmas! I hope you have as happy of a relationship with Press'n'Seal as I have. If things work out for you, please let me know what fun projects you come up with, as this is my first experience with this stuff I feel that this is just beginning to scratch the surface so let me know what you come up with!


 UPDATE:

Here's another example of Press'n'Seal at work. I used this example at a local resturant I decorated for Halloween, same application as before, this time with faces and hands instead of lettering. For the faces I just free handed the images, and traced my own hands. Then to give it an extra creepy effect I draped some creepy cloth from the dollar tree over the mirror. Another quick, easy way to creep up your place for Halloween!

Monday, September 3, 2012


The Raven Wreath


The                            Once upon a midnight dreary, while I wondered weak

                                          and weary,

                             Over many a quaint and curious craft of forgotten

       Lore…

While I prodded, quickly wrapping, suddenly there came

         a tapping,

As of someone gently rapping, rapping at my craft room door.

       In stepped in the idea of the Rave Wreath of the saintly days of yore.

Quoth the Raven Wreath, “Nevermore.”


This year for Halloween I decided to make the theme of my living room Edgar Allen Poe’s infamous poem The Raven.  I have always loved this dark ominous poem and with all the great little crows and ravens you can pick up at any craft store, made this theme is ideal.

Even better all the supplies needed, can be purchased at your local dollar tree, so it’s fairly inexpensive while providing a striking decoration that is reminiscent of Victorian gothic and Hitchcock’s The Birds (would work well for Bird’s theme too).


Supplies:

Grapvine wreath (any size, but keep in mind bigger, means more birds)

Plastic shopping bags

Creepy cloth

Craft or floral wire

Birds, birds, birds


The wreath shown here is relatively small compared to most wreaths, I made it to be hung inside a mirrors’ frame, so it didn’t need to be huge, but could easily be adapted to a larger wreath.


Start with your wreath base.


Save your shopping bags from the dollar store, or dig some out of the recycling bin and use them to puff up your base a bit before applying your creepy cloth.  Just wrap around and secure by tying the handles together.  Pull and puff to fluff it up.


Time for creepy cloth!  I love, love, love creepy cloth!  Whatever you use it for it adds an instant sense of the macabre; because it’s so cheap and effective I use it everywhere for Halloween.  If it’s your first time using it, you can fall in love with it by letting it wrap, drape and dangle and revel in its eeriness.  Just play with it till you achieve the look you want.  I like to pull strands of it to dangle to add to that old, decayed look.  Once finished, secure by taking your wire and weave and wrap it to loosely to secure the cloth.


For the finishing touch…The Raven.  I used fourteen, dollar tree has about three different poses, I used a mixture of these, with the majority with the spread wings for the effect that the birds could fly off at any moment. 

 
Play with the arrangement before wiring the feet to the wreath.  I placed one at the top to give it the effect that he is looking right at you, kind of unnerving isn’t it?

Pull a few strands of creepy cloth and hang it up for a sinister decoration.


Heres how it turned out.  I replaced my pictures with images of ravens and a picture of Mr. Poe here and there, add some ravens under glass domes, and a few quotes of The Raven on some chalk board signs and you have a simple but spooky themed room for your Halloween decorations.


I’ll have more pictures of the rest of the living room and the house when I have it in full Halloween mode, closer to October… I promised my husband that I wouldn’t decorate the house this early, not until mid-September at least. J

Tuesday, April 24, 2012


Recycled Plastic Bottle Pots

This year my husband and I have decided to start a garden.  Our goal was to grow organic vegetables, become a little more self-sustaining, and maybe even shave a few dollars off the grocery bill while at the same time not having to sacrifice fresh healthy veggies.  But we soon realized starting a garden can be a little daunting when you take a walk through the garden section, so many supplies, so many tools, so much money can be spent if you’re not careful.  So, in order to achieve our gardening goal, and not sink a ton of green into our green living, I’ve come up with a few tricks to help us save.  The first of what I hope will be many more cost cutting tips, is my recycled plastic bottle pots.  No, this is not a revolutionary ground breaking concept, but for those of you that are a little slow (like me) maybe this can help you too.
This is a super easy project that requires minimal effort, one tool, and the best part…FREE!  Just dig out those plastic bottles out of your recycling bin, if you don’t have a recycling bin (get a recycling bin) dig it out of your neighbors recycling bin and you’re in business!

Materials:
Plastic drinking bottles
Potting soil
Plants or seeds

Tools:
Sharp knife
Ice pick (optional)
Heavy duty gloves (optional for you rebels that like to live dangerously)

Take your bottle (any plastic container will do), lay it on its side on your cutting board and grip securely with one hand and cut 3 to 4 inches from the bottom.  The height of your bottle pot should be determined by the size of plant you will be using this for.  But, be careful not to make it too tall or it will take a lot more potting soil to fill it, and since this is just a temporary fix till your plants are big enough for the garden why waste that expensive dirt?

*A tip for cutting, most of your popular bottles have ridges along the sides as part of their design.  Use this as your marker in order to keep your knife in place as you cut.


After you have cut the bottles, take your knife or another sharp implement to cut small holes in the bottom for drainage.  I put my knife inside of the bottle to keep it steady, and since I still have all of my fingers after, so I would say that it was successful.


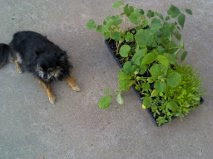
As you can see my plants have exploded and have quickly outgrown their fancy seed starter trays they started out in.  But, I’m not ready to plant them in the garden just yet, mostly because I have yet to build the raised beds for them.  Leo is helping demonstrate that the plants are over running their existing home.  He’s so helpful!


Now put your plants in your free bottle pots and congratulate yourself on your thrifty genius!


And it you need something to help you corral all your clever little pots you can reuse the tops of your seed starter.


Or a handy dandy cardboard six pack caddy. 


I hope this helps you in your own gardening adventures, enabling you to provide healthy produce for your friends and family at a much lower cost than the store.   Fresh fruits and veggies should be a part of our daily lives.  And with the economic stress we’re all under, eating healthy should not have to be forfeited for cheaper less nutritious options.
Good luck my green thrifty crafters!  And may the green thumb be with you!


Friday, April 20, 2012


Tool Roll-up


Here is a handy quick project that you can easily adapt to suit whatever type of tools you need to keep  you organized and mobile in all your creative endevors.  And with a little ingenuity you can adapt it to whatever size or tools you need to suit your needs.   And if that isn’t enough to get your crafty little minds excited, it’s also cheap!  Now are you excited?  That’s what I thought, let’s get to it!


Materials:

Fabric (I had about a yard with plenty left over, amount of fabric is determined by the size of roll-up)

Ribbon or bias tape (again amount is to be determined by size of desired roll-up)

Felt

Heat bond

Buttons or Velcro (depending on what type of closure will best suit your needs)


Tools:

Fabric scissors (regular will work, but they don’t cut as well)

Iron (dry setting)

Sewing machine

Straight pins

Yard stick

Measure how big you want your roll-up to be, I suggest laying out the tools you plan to use this on your fabric.  Then place your felt on the fabric to determine where you will be cutting the fabric.  Don’t cut the fabric yet!  A helpful hint; I used pre-cut felt sheets and butted them up at the ends to get the length I needed and sandwiched them in the fabric fold and cut around the felt.  It creates a natural line and if you use the fold (pictured below) you will have one less raw edge to finish.  Win win, for all you novice sewers like myself!
*Don’t forget to allow for enough fabric around the perimeter of your project to have enough space to finish your edges! 


Now pin it!  No, I don’t mean pin it on Pinterest, at least not yet, finish that little beauty first then feel free to re-pin.  Pin the edges, don’t be stingy with your pinning, it will help everything stay in the right place to make your sewing go easier.


Next, fold up the excess fabric to create the pocket to house your tools.  Fold it up towards the top of your piece.   Aren’t you glad I told you not to cut that extra fabric off?  I just saved you another sewing step! 


Measure how big you want your pocket to be.  Once you determine how deep you want your pocket , fold your fabric back towards the bottom.  Now that your pock front has been folded twice, and is all lined up with your felt underneath, cut along that felt line I mentioned earlier.


To reinforce the pocket front, use heat bond to iron on to the inside of that fabric fold.  This is a little hard to describe and isn’t easy to see from the picture, so hang with me and I will try to explain it the best that I can.  Unfold the pocket fabric so that you have one big piece of fabric.  Next, lay out your heat bond on top of your pocket fabric.  You want to make sure you have heat bond covering the entire area of the inside of the pocket.  This will be the inside of the pocket so don’t worry this will not be seen.  Set your iron to the dry setting on the appropriate fabric setting.  Now iron on the heat bond onto the fabric (paper side up), following the heat bond instructions.

Once you have properly adhered the heat bond to the fabric, cut the excess bond sheet off.  Remove the paper backing.   After doing that, fold the pocket fabric in half (the half should be the size of the pocket depth originally measured).  Iron this pocket fold.  By doing this with the folding you will have a strong pocket front so that if you are using this to house any sharp tools they will not poke through and will keep heavy tools from sagging or bulging in the pocket. 


After you iron the pocket insides together, fold the pocket up and pin in place.  Now, you have basic structure of your roll-up complete. You’ll notice that by double folding the pocket fabric, I being the oh so kind person that I am, has saved you yet another edge to finish!  You’re welcome!   


Get your tools out and arrange in the pocket where you plan on putting them and pin accordingly. 


Time to sew!  Sew it all!  Sew that bad boy like there is no tomorrow!  Sew you have never sewn before!  Enjoy the sewing pep talk?  I’ll do whatever I can to help to get you excited about sewing, I know it can seem daunting, but it’s really not that bad.  I have given you all straight lines, so some simple straight stiches will get the job done.
Don’t forget to sew all those individual pockets closed.   I went ahead and took the stitches all the way up, but I that’s up to you. 

To finish the side edges, sew binding tape to the sides.


The method to keep it closed is up to you, you can use Velcro, snaps, ties, or buttons like what is shown.  To give it a little more of a finished look, I made some of my left over binding tape run the length of the roll with extra at the ends that I used to create loops for my buttons.


Then sew on your buttons and fill up those pockets!  Roll it up and you have a new great little organizer to keep your tools handy wherever you go! 


You could even adapt it into an apron for tools that will be even right at your fingertips.  However you decide to work it, I hope this helps you stay organized and maybe even buy you a little precious time and sanity when all your tools are right in their place.  Happy crafting!


Sunday, March 4, 2012


Something old, something new, something borrowed, and something blue for a thrifty and Green wedding


When my husband and I started planning our wedding we both had a few goals in mind.  My goals were to create a beautiful, memorable event that was as environmentally friendly as possible.  My husband’s goals were to keep it within our budget and keep it green as well.  To meet both our goals we worked hard to make as much as we could on our own and before we purchased anything we asked ourselves, “Can we re-use this in the future?”  Simple as that sounds it was vital to us that we be able to either reuse or recycle the majority of what we used in order to minimize our wedding waste.  If you have never planned, hosted, or cleaned up a wedding before, you may not realize just how much is thrown out after the big day.  From decorations, to food, to wedding attire that is only worn once, there is an excess of waste generated from the wedding industry.  Even if you are not interested in keeping your big day green, you should be interested in saving green, and all that waste can equal a ton of wasted money.

In order to help you out in both areas here are some things we used to help us for our wedding and for some others I’ve helped out with in the past. 


Something Old

(Bible borrowed from Grandma O’Key)

Chances are you know someone who has had a wedding or another big event in the last few years.  Think back on their decorations, serving pieces, or accessories anything you liked?  Perhaps your family has pieces passed down that would give a personal touch that a new piece could not.  Ask them if they wouldn’t mind lending it to you for your big day.  Obviously you will treat this item with the utmost care, so that you can return the items better than when you borrowed it in the first place.  This is especially true when borrowing accessories the bride might have worn, or heirloom pieces, these are items to be treasured and possibly passed to another bride in the future. 
We did this in several areas; the brooch that secured the ribbon on my bouquet was my grandmothers and my sister used it for the same purpose in her wedding.  My husband wore his father’s cuff links, my sister let us use her cake serving platter and cutting tools from her wedding, we asked our officiate to hold my husband’s grandmother’s bible,  some of the tables were covered in borrowed linens (everybody has white table cloths, ask before you rent).  Not only did this help us save money, and decrease our wedding’s carbon footprint it also included our loved ones in our big day and created lovely traditions our family can share.


Something borrowed….


(Rented columns, chairs, and sashes)


Renting is another great way to reuse items that you wouldn’t normally use again in the future, i.e. cake stands, silk arrangements, chairs, table cloths, lighting, giant columns, etc.  Unless your planning on redecorating your home and the homes of your friends and families in a your wedding decor, consider borrowing or renting items like these to save you money and sanity after your day is over.  Remember whatever comes up, must come down and either be thrown away or put away.  No one has room for a hundred silk centerpieces, or wants that many. 
Most towns have at least one, and this can be a great resource for those supplies.  Some rental companies even offer delivery and pick up, which could come in handy when you’re renting tables and chairs for a large event, but you have no access to a truck.  Of course depending on how far away your event is from their warehouse there will be a charge for delivery, but with everything you will have going on that day, this is something to consider and can be well worth the expense to save you precious time and sanity.


Something New
(New pieces; flower tins, branches, and pumpkins that can be reused in the future)

 
One of the great things about weddings is that no two are a like, that can also be a bad thing when trying to decorate on a tight budget.  You’ve already exhausted all your resources from recently married friends and family, and you can’t afford to rent all the pieces needed for your vision.  Luckily if your somewhat crafty, or know someone who is, you can make your decorations using existing repurposed pieces at a fraction of the cost! 

Luckily a big trend right now in decorations is branches and twigs.  Florists have been using these in arrangements to create visual impact in normally ordinary arrangements, and so can you.  We used this concept for some of our aisle decorations that doubled as our centerpieces.  Branches can be purchased at most any craft or home decorating store, but if you’re really thrifty, and a little outdoorsy you can make them for free if you go get your own from Mother Nature.  Again, I’m sure it goes without being said, but I’m going to say it anyway, please do not go chop down your neighbor’s trees, or worse yet a tree in the park.  I know how the wedding frenzy can take over, but just because it’s the biggest day of your life, does not give you license to go crazy and hack apart your mother’s beloved magnolia.  She won’t appreciate that, and niether will the poor tree, try to use some restraint.  I suggest looking in your own backyard, ask friends and family that have some wooded property or in my case I pruned my uncle’s weeping willow for him and saved the branches.  Everybody wins!  I will note that the orange blooms seen in the picture shown above are not original to the branches.  In my own personal mania to create the perfect wedding I wired silk flowers to the branches.  If you would like to know how or are interested in a tutorial, message me and I’ll get to work on that!    

We also used a mix of pumpkins on the tables and scattered throughout, for these I purchased forever pumpkins from craft stores, not my cheapest decoration for as many that we used, but they will go to good use for all of our fall decorations.


To keep your pocket book from getting Blue from spending…


(Chair sashes used to dress up plain metal chairs)
A few quick tips;

-Reuse all those wedding gift bags to corral all your essential items (shoes, accessories, makeup, rings, vows, etc) for you and your wedding party to keep you organized for the big day.


-If your venue has chairs, but they’re not the prettiest (metal chairs), instead of renting the fancy ones that will cost you an arm and a leg.  Consider renting chair covers, or even just the chair sashes to dress them up.  No, it will not make them as nice as the expensive rentals, but you will find that once people fill the space and the chairs, no one will notice that they’re only metal chairs.

-Lanterns, lanterns, lanterns!  These are a great way to add instant impact for oh so little dough!  And, if you take good care of them you can use them over and over again for other events!
-Hold onto that scrap fabric if you are having anything custom made, my clever sister used the extra fabric from the flower girl dresses and even some from her wedding and made fabric flowers for wrist corsages and hair pieces for the wedding party.


Just remember, that while this will be one of the biggest days of your life, it is after all just a day.  And when it’s all said and done you will walk away that day with a partner for life, and hopefully beautiful memories of your loved ones that came to support you.  Those things are far more important than any decorations, clothes, or accessories worn during it.  So don’t stress my lovely bride, do what you can, forget about what you can’t do, and soak up every second of this beautiful moment.


Sunday, February 26, 2012

Chalkboard Signs


Since I have a few projects in the works, but no results to show yet, and I’m just itching to post about something crafty.  I thought I would tell you about one of my new latest craft/décor obsessions.  Chalkboard paint!  This stuff is AMAZING!  There is nothing you can’t do with it, it turns boring fixtures into amazing pieces of retro art.  And is a great way to label things in an unexpected way. 
My first endeavor with this was for my wedding, we had a big crowd and the ceremony and reception was taking place at this big beautiful old building that had two floors that we rented with all the usual weddingy hot spots spread throughout the building.  So in order to keep my guest happy and the staff of helpers sane I wanted to clearly, but cutely mark all the areas to keep everyone in the know.  Solution: the chalkboard sign!  These are huge right now, especially at weddings.  And with all their great uses for the day of and after, why wouldn’t they be? 

It’s pretty easy to create these handy little guys, and with all the wedding crafts I had on my plate, this was one of my favorites because they were so easy!

My supplies for this project:
1 quart of chalkboard paint (a little goes a long way, I still have at least half left even after this project and several others)
Thin board cut to size
Frames
Chalk

Tools
Sponge Roller and paint tray
Hand sander (You sand it the old fashion way, but try to get your hands on a sander to safe you time and energy)
Medium to fine grit sanding sheets for sander (depending on how textured your board is)

Measure your frame and cut your board to size (carefully measure the inside of the frame and make sure it has a little wiggle room, as it is much harder to make a solid piece of wood fit in a snug frame than it is to fit a picture).

Sand your board till it’s nice and smooth, if you can feel any grooves keep sanding. 

After you have a smooth surface to work with, dust off all remaining dust or grit with a slightly damp cloth or paper towel.

Time to paint!  Make sure your can is well mixed and pour it in the tray, again a little goes a long way so unless your project is huge, refrain from dumping the whole can in!

Apply the paint with a clean sponge roller.  For the first time I did this I used a regular roller and it turned out ok, but you will have much better results with the sponge roller. 
Give it one even coat rolling in one direction, and at least a second in the opposite direction.  You will probably need to apply a third, but let each coat dry completely before charging into the next coat.

Once you have a few coats on and dry, give it a spin and draw or write with some chalk!  If you notice a lot of friction when applying the chalk and you can’t get the chalk to make a fairly smooth line, your probably going to have to sand that bad boy down a bit more.  Don’t beat yourself up, I did this the first time too, I get a little to excited sometimes and skip out of the beginning steps, you can just sand right over the paint (dry paint), switch to a finer grit of sand paper if need be, and try again.

Now, try your chalk again.  Is that better?  Good, don’t try to make whatever it is your writing/drawing perfect for your final project perfect, cuz your just going to wipe it all off anyway.  Don’t argue with me, it say so on the can, and if you argue with a can you’re going to look pretty silly.  This gives it that nice old classroom chalkboard look.

After you’ve done that, you can pop it in the frame.  You can do this before the last step, but you will not get that blended in classroom look as well up to where the frame meets the board, and you might get your frame dirty.  But this is your project and you can do with it as you will, which is usually what I do, and then go back and try it the other way later.

Now write something inspirational, lead your people with your magnificent direction sign, label with reckless abandon.  It’s up to you!  You are now the proud owner of a chalkboard sign!